How to Hang A Garland on Your Stairs
Published: 31/10/2025
Learn how to hang a garland on your stairs with our easy guide. Discover bannister decorating tips, no-damage methods and beautiful Floralsilk garland ideas.
SPEND £75 MORE FOR FREE DELIVERY
Spend £75 for Free Delivery
Published: 31/10/2025
Learn how to hang a garland on your stairs with our easy guide. Discover bannister decorating tips, no-damage methods and beautiful Floralsilk garland ideas.
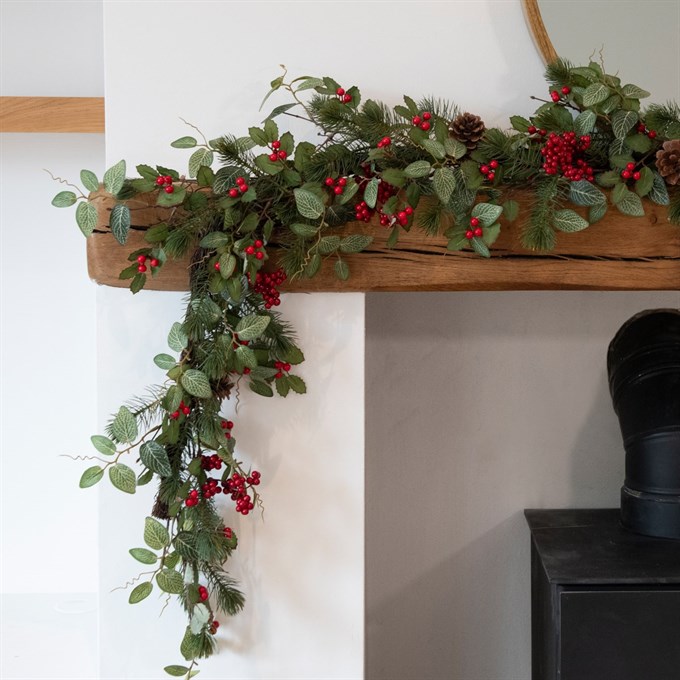
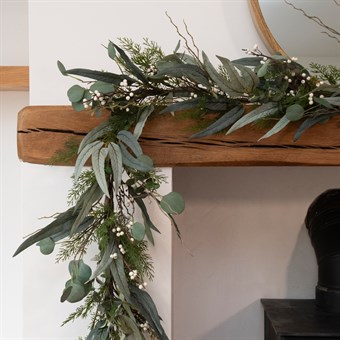
Garlands look fantastic at any time of year, but we particularly love them at Christmas. The most popular spaces for them are doorways, mantelpieces, and staircases, the latter of which might well just be our favourite. It’s an invitation to find more decoration throughout the home, bring the festive décor to the forefront, and take your everyday functional stairs to Pinterest-level interior design.
It’s important to know that your garland is securely held, especially on the stairs where you’re more likely to have it touched or knocked. Our Garlands are bendable and so will hold their shape to your staircase, but for extra security, you may wish to use hooks for placement and ties for their security. If in keeping with your theme, ribbons and bows can be a way to do this without needing to obscure them. We tend to use green floristry wire so it blends with the garland itself.
Cable ties are a commonly used everyday product to secure garlands, as they’re strong and convenient. They’re not always the prettiest option, however, so it can be worth manipulating the foliage to cover this or using decorations to obscure it.
An alternative to this is using removable sticky hooks, which many people already have in their home, or ribbons, which don’t need to be hidden and can be as much a part of the décor as the garland itself.
When you first take out your garland, whether because it’s brand new, or because it’s been in storage over the non-festive season, the best thing you can do is give it some initial love. Lay your garland out and stretch and shape it, making sure that it’s not maintaining any awkward folds from its storage.
If it’s pre-decorated, make sure the ornaments are looking as nice as you’d like them, free from dust and clearly visible. If it features branches, take the time to separate these. It is easy to want to jump straight into the draping, but these extra few minutes can make a real difference to the finished look.

The most important part of course is how to drape the garland. You should aim to start at the top of the stairs, working your way down so that it’s easier to secure as you go. When you’ve got either decorations, lights, or foliage included, this also makes it easier to twist to have these visible, with gravity working with you.
You can opt for a taut look by wrapping it around each balustrade of the staircase, or a more gentle and traditional look by skipping a few – every two or three is our usual favourite. This option may also be dictated by the length of your garland vs the length of your stairs.
If you’re adding lights, it’s easier to drape these alongside the garland as you go, both to avoid tangles and also to ensure the positioning is as you like it as you go on.

The last thing you want to do is damage your staircase with your garland, and although it depends on your staircase, there are a few tips worth knowing.
Once upon a time, people would add nails to their bannister to secure things like garlands, but nowadays we prefer self-adhesive hooks. Many of these are marketed as removable with no damage and are designed to prevent residue from remaining. Try to opt for these over things like double-sided sticky tape, or others like it, that can strip varnish or leave remnants after removal.
With any method you use to hang your garland to the stairs, you should try to add in support as frequently as is reasonable, and at even intervals. The less a single securing factor is holding a load, the less presses into your stairs, reducing the risk of any damage.
Wooden staircases can be a little easy to damage, but using soft options like ribbons, and perhaps even cable ties, can prevent damage from occurring to it. Alternatively, you can use ribbons or fabric to line the banister, placing the garland on top of it, for extra security.
Finally, it’s time to personalise your garland. Add in any additional external components, like ornaments, bows, ribbons and more. If you’re looking for inspiration, we’ve a whole blog on the best way to personalise your garlands!

Loose ends can unravel, so be sure to secure the ends of your garland at the top and bottom of the staircase (and then move on to adding securements to the middle of your garland).
But how long a garland do you need? Top tip: the average UK staircase is 13 steps, usually needing around 9–10 feet of garland to complete in a natural look, or 12–15 feet of garland for a full, swooping style. You should aim to add 10%+ to the length of your bannister in garland length as a minimum, but having a longer garland is easier to work with than one that is too short. The last thing you want is to reach the bottom and find you’re too short to complete the staircase!
Whilst it’s easier to drape your garland from top to bottom, if you’re adding in lights, be aware of the length to the plug socket – and if you need to swap it around. Otherwise, all your hard work will be wasted!
Here at Floralsilk, it’s safe to say we know what we’re talking about when it comes to home décor, having been in the industry for decades. Our garlands make for fantastic pieces, realistic, striking, and a whole lot of fun. Shop the whole collection today!